Owning a vintage iPad is like having a classic car – it has character, a storied past, and still gets the job done, but it might need a little more tender loving care than its younger counterparts. While the latest models might boast cutting-edge features, there's an undeniable charm and utility in an older iPad, whether it’s for reading, browsing, or running specific legacy apps. But just like any piece of cherished technology, even the most robust vintage iPads can encounter glitches. This comprehensive guide on Troubleshooting Common Issues and Maintenance for Vintage iPads will empower you to diagnose, fix, and even prevent common problems, ensuring your beloved device continues to serve you well.
At a Glance: Key Takeaways for Vintage iPad Care
- Start Simple: Many issues resolve with a basic restart or force restart. Know the difference for iPads with and without a Home button.
- Charging Matters: Always suspect your cable or adapter first if your iPad isn't charging or turning on. Use original or certified accessories.
- Connectivity Check: For Wi-Fi or cellular issues, rebooting both your iPad and router is a crucial first step. Resetting network settings often helps.
- Software is Key: Keep your iPad's iOS/iPadOS as updated as its model allows, and routinely update apps. Old software can cause performance and stability issues.
- Storage Space: A full iPad is a slow iPad. Aim to keep at least 2GB of free storage for optimal performance.
- Backup, Backup, Backup: Before any major troubleshooting step (especially a factory reset), always back up your data to iCloud or your computer.
- Know When to Get Help: Some issues, like dead pixels, water damage, or persistent hardware problems, require professional intervention.
Why Your Vintage iPad Deserves TLC (and Troubleshooting)
In an age of rapid tech cycles, keeping an older device running isn't just about saving money; it's about sustainability and appreciating design that truly lasts. Vintage iPads, from the earliest iterations to models a few generations back, were built with impressive durability. However, time and countless hours of use can take their toll. Understanding how to address common issues not only extends your iPad's life but also deepens your connection to a device that, for many, was their first foray into the tablet world. Perhaps you’re still using a foundational model; if so, you might be interested to Explore the first generation iPad. These older devices often present unique challenges that differ slightly from their newer, more streamlined cousins, primarily due to older hardware and software limitations.
The First Line of Defense: Basic Resets & Checks
Before diving into complex diagnostics, always start with the simplest solutions. Many tech problems are surprisingly easy to fix.
The Power Cycle: Off and On Again
This age-old trick is effective because it clears temporary glitches from the iPad's memory.
- For iPads with a Home button: Hold down the Top (or Side) button until the "slide to power off" slider appears. Drag the slider, then wait for the device to completely shut down. Press the Top (or Side) button again to turn it back on.
- For iPads without a Home button: Hold down either Volume button and the Top button simultaneously until the "slide to power off" slider appears. Drag the slider, then wait for the device to shut down. Press the Top button again to turn it back on.
Soft Reset (Force Restart): When Your iPad Won't Respond
If your iPad is completely frozen and won't respond to touches or the power-off slider, a force restart is your next step. This won't erase any data.
- For iPads with a Home button: Press and hold both the Home button and the Top (or Side) button simultaneously. Keep holding them until you see the Apple logo appear (usually around 10 seconds).
- For iPads without a Home button: Quickly press and release the Volume Up button. Quickly press and release the Volume Down button. Then, press and hold the Top button until the Apple logo appears.
Factory Reset: The Nuclear Option (with a Safety Net)
A factory reset erases all data and settings, returning your iPad to its original, out-of-the-box state. This is a drastic step, usually reserved for persistent performance issues or when selling/gifting the device.
Crucial Step: Always back up your iPad first! You can do this via iCloud (Settings > [Your Name] > iCloud > iCloud Backup) or by connecting to your computer and using Finder (on macOS Catalina or later) or iTunes (on older macOS or Windows).
- Go to
Settings > General > Transfer or Reset iPad > Erase All Content and Settings. - You'll be prompted to enter your passcode and Apple ID password to confirm.
Check Compatibility for iPadOS Updates
Vintage iPads have a ceiling for iPadOS updates. Ensure your device is compatible with the latest version you're trying to install (e.g., if it can only go up to iPadOS 12, don't expect it to run iPadOS 17). Regularly check for available updates within its compatible range.
- Go to
Settings > General > Software Update.
Screen & Display Woes: When Pixels Misbehave
The display is your primary interface with the iPad, so issues here can be particularly frustrating.
Frozen Screen Glitch
Beyond a simple force restart (as described above), if your screen remains unresponsive after trying the initial steps:
- Restore via Computer: Connect your iPad to a computer with iTunes (Windows or older macOS) or Finder (macOS Catalina or later).
- Enter Recovery Mode: You'll need to put your iPad into recovery mode.
- With Home button: Press and hold the Home button and the Top (or Side) button until the recovery mode screen appears (a computer icon with a cable).
- Without Home button: Quickly press and release Volume Up, then Volume Down. Then, press and hold the Top button until the recovery mode screen appears.
- On your computer, iTunes/Finder should detect an iPad in recovery mode. You'll have options to "Update" or "Restore." Choose Update first to try reinstalling iPadOS without erasing your data. If that doesn't work or the problem persists, Restore will reinstall iPadOS and erase all data (hence the importance of a backup!).
Dead or Stuck Pixels
These are small, unresponsive dots on your display.
- Stuck Pixel (wrong color, but not black): Sometimes, gentle, firm pressure with a cloth-wrapped thumb on the pixel, or using a "pixel fixer" app that rapidly flashes colors, can revive it.
- Dead Pixel (permanently dark/black): Unfortunately, a truly dead pixel cannot be fixed with software or simple pressure. It indicates a hardware failure in that specific pixel.
- When to Act: If a dead pixel bothers you significantly, the only solution is a display replacement. This is a job for an Apple Store or a reputable professional repair shop. For a vintage iPad, weigh the cost of repair against the device's value and your usage needs.
Power & Charging Conundrums: Keeping Your Vintage Device Juiced
Battery and charging problems are among the most common complaints for any mobile device, especially older ones.
iPad Won’t Turn On
If your iPad is completely unresponsive:
- Force Restart: Try the appropriate force restart method for your model (Home button or no Home button, as described earlier).
- Charge It Up: A completely depleted battery is a common culprit. Plug your iPad into its original charger (or a known working, quality charger) and let it charge for at least an hour before attempting to turn it on again.
- Check Accessories: Try a different lightning/USB-C cable and a different power adapter. Faulty accessories are a frequent cause of charging issues.
- Recovery Mode (if stuck during startup): If it turns on but gets stuck on the Apple logo or a similar screen during startup, connect it to your computer and force restart, but keep holding the buttons until you see the recovery mode screen (not just the Apple logo). Choose "Update" in iTunes/Finder to try reinstalling iPadOS without data loss. If "Update" fails, "Restore" is the next step (remember that backup!).
- Professional Help: If none of these steps work, the battery or logic board may be faulty. Contact Apple Support or a repair shop.
iPad Won't Charge
This can be frustrating, especially if your iPad seems to be working otherwise.
- Test Cables and Adapters: The #1 cause. Try a different charging cable and a different power adapter. Test your current setup with another device if possible.
- Inspect Ports: Carefully inspect the charging port on your iPad for any lint, dust, or debris. Use a small, non-metallic tool (like a wooden toothpick or a blast of compressed air) to gently clear it out. Also check for bent or broken pins.
- Reboot the iPad: Sometimes a simple restart can resolve minor software glitches affecting charging.
- Enable Airplane Mode: Some users report success by enabling Airplane Mode while charging, as it reduces background activity and power draw.
- Professional Assessment: If the problem persists after trying different accessories and troubleshooting, the issue likely lies with the iPad's charging port, battery, or internal components. This requires professional repair.
Slow Battery Recharges
A typical full recharge for an iPad should take around 3-4 hours, depending on the model and charger. If it's taking significantly longer:
- Update iPadOS: Ensure your iPad is running the latest iPadOS version compatible with its hardware. Sometimes, OS bugs can affect charging efficiency.
- Inspect Ports and Connectors: Again, check for grime or damage on both the iPad's port and the charging cable's connector.
- Use Original or Certified Accessories: Generic or cheap charging cables and adapters might not deliver sufficient power, leading to slow charging or even damage. Stick with Apple-certified options.
- Minimize Usage During Charging: Charging is fastest when the iPad is idle. Enable Airplane mode, disconnect Wi-Fi and Bluetooth, and avoid heavy usage (gaming, streaming) while it's plugged in.
- Avoid Extreme Temperatures: Charging in very hot or very cold environments can slow down the process and even degrade battery health. Charge at room temperature.
Connectivity Headaches: Staying Online & Connected
The internet is often essential for your iPad's functionality. When Wi-Fi or cellular connections falter, it can be a major inconvenience.
iPad Won't Connect to Wi-Fi
- Verify Wi-Fi is On: Go to
Settings > Wi-Fiand ensure the toggle is enabled. - Check Other Devices: See if other devices can connect to the same Wi-Fi network. This helps determine if the issue is with your iPad or your router/network.
- Reboot Everything: Restart your iPad. Then, power cycle your Wi-Fi router (unplug it for 30 seconds, then plug it back in).
- Forget Network and Reconnect: In
Settings > Wi-Fi, tap the "i" next to your network, then select "Forget This Network." Reconnect by selecting it again and re-entering the password. - Reset Network Settings: Go to
Settings > General > Transfer or Reset iPad > Reset > Reset Network Settings. This clears all Wi-Fi passwords, cellular settings, and VPN configurations, forcing your iPad to start fresh. You'll need to re-enter your Wi-Fi password. - Update iPadOS: Ensure your iPad has the latest iOS software compatible with its model.
- Contact ISP/Try Another Network: If issues persist, contact your Internet Service Provider. Try connecting to a different Wi-Fi network to rule out a hardware problem with your iPad's Wi-Fi antenna.
Cellular Data Connection Dropping
If your vintage iPad has cellular capabilities and struggles to maintain a connection:
- Check Cellular Data Settings: Go to
Settings > Cellular Dataand ensure it's enabled. - Restart iPad: A quick restart can often resolve temporary network glitches.
- Update Carrier Settings: Go to
Settings > General > About. If an update is available, you'll see a prompt. - Reinsert SIM Card: Power off your iPad, use a SIM ejector tool to remove the SIM card, then reinsert it firmly.
- Reset Network Settings: As mentioned for Wi-Fi,
Settings > General > Transfer or Reset iPad > Reset > Reset Network Settingscan help. - Disable LTE (if applicable): In some cases, older iPads might struggle with LTE. Go to
Settings > Cellular Data > Enable LTEand try disabling it to see if it improves stability (though it will reduce speeds). - Factory Reset: If all else fails, a factory reset (after backing up) can sometimes resolve deep-seated software issues affecting cellular connectivity.
- Contact Carrier/Apple: If the problem persists, contact your cellular carrier or Apple for further diagnostics.
iTunes or Finder Don't Recognize the iPad
Connecting your iPad to a computer is essential for backups, updates, and restores.
- Check for Charging Icon: When connected, does your iPad show the charging icon? If not, try another USB port on your computer or a different USB cable. The cable might be for charging only, not data transfer.
- Update iTunes/Finder: Ensure you're running the latest version of iTunes (for Windows or older macOS) or that your macOS is updated (for Finder on Catalina or later).
- Restart Both Devices: Restart your iPad and your computer, then try reconnecting.
- "Trust This Computer": Unlock your iPad when connected to the computer. If prompted, tap "Trust this computer." Without this, the computer won't access your iPad's data.
Performance & Software Snags: Keeping Things Running Smoothly
Even if your vintage iPad can't run the latest iPadOS, maintaining its software and managing its resources are key to decent performance.
iPadOS Updates Not Installing
If an update is available for your iPad model but won't install:
- Check Compatibility: Double-check that your specific vintage iPad model is actually compatible with the iPadOS version you're trying to install.
- Battery Charge: Ensure your iPad has at least 50% battery life (preferably plugged into power) before attempting an update.
- Sufficient Storage: Updates require significant free storage. Go to
Settings > General > iPad Storageto check. Delete unnecessary apps, photos, or videos to free up space. - Stable Wi-Fi: Do not use cellular data for updates. Ensure you're on a strong, stable Wi-Fi connection.
- Disable Low Power Mode & VPN: Go to
Settings > Batteryand turn off Low Power Mode. Also, temporarily disable any VPN profiles you might be using inSettings > General > VPN. - Manual Update via Computer: If over-the-air updates fail, connect your iPad to your computer and try updating through iTunes/Finder.
iPad Running Slow or Lagging
Vintage iPads, by their nature, won't be as zippy as new ones, but they shouldn't be unbearably slow.
- Close All Open Apps: Double-tap the Home button (or swipe up from the bottom and pause for iPads without a Home button) to bring up the app switcher. Swipe up on each app preview to close it completely.
- Perform a Soft Reset: A force restart (as described earlier) can clear temporary memory issues.
- Check and Free Up Storage: This is critical. Aim for at least 2GB of free storage. Go to
Settings > General > iPad Storageto see what's consuming space. Delete large files, offload photos/videos, or uninstall unused apps. Reinstalling apps can sometimes clear their cached data, too. - Clear Safari History and Website Data: Over time, Safari can accumulate a lot of cached data. Go to
Settings > Safari > Clear History and Website Data. - Factory Reset (Last Resort): If performance issues persist, back up your iPad and perform a factory reset. Test its performance before restoring your backup. If it's fast without your data, then the issue might be with a corrupt file or app in your backup. Restore selectively.
iPad Randomly Crashes and Glitches Out
Sporadic instability can be due to software conflicts or insufficient resources.
- Soft Reset/Power Cycle: Always try a simple restart first.
- Update Software and Apps: Ensure your iPad's iPadOS is as updated as possible for its model, and all your apps are updated from the App Store. App developers often release updates to fix bugs and improve compatibility.
- Clear Safari Data: If crashes seem to happen often in Safari, clear its history and website data (
Settings > Safari). - Factory Reset and Restore: If random crashes persist, a factory reset followed by restoring from a backup is a strong troubleshooting step. If the problem is easily reproducible (e.g., "it always crashes when I open X app"), note that information down and contact Apple Support.
iPad Stuck in Bootloops
A bootloop is when your iPad repeatedly tries to turn on, shows the Apple logo, then turns off again in a continuous cycle. This often indicates a deeper software or hardware problem.
- Wait for Updates: If the bootloop started after an iPadOS update, it might be a known bug. Check Apple's support pages or tech forums for similar reports.
- Force Manual Restart: Try the force restart method for your iPad model (Home button: Power + Home; No Home button: Volume Up, Volume Down, then Power).
- Enter Recovery Mode for Update/Restore: If a simple force restart doesn't work, you'll need to enter recovery mode and connect to a computer with iTunes/Finder.
- With Home button: Hold the Home button and the Top (or Side) button until the recovery mode screen appears.
- Without Home button: Quickly press and release Volume Up, quickly press and release Volume Down, then press and hold the Top button until the recovery mode screen appears.
- Once in recovery mode, you'll get the option to "Update" or "Restore." Try Update first to reinstall iPadOS without losing data. If that fails or the loop continues, Restore is the next step (which will erase all data, emphasizing the need for a backup).
Accessory Annoyances: Getting Your Apple Pencil to Play Nice
If you use an Apple Pencil with your vintage iPad, occasional connectivity issues can arise.
- Verify Compatibility: Not all Apple Pencils work with all iPads. For example, older iPad Air 2 models and earlier are not compatible with any Apple Pencil. Make sure your specific Apple Pencil generation is compatible with your specific iPad model.
- Restart iPad: A simple restart can often re-establish Bluetooth connections.
- Check Bluetooth Settings: Go to
Settings > Bluetooth. Ensure Bluetooth is on. If the Apple Pencil is listed under "My Devices," tap the "i" next to it and select "Forget This Device," then try to re-pair it. - Charge Apple Pencil: It sounds obvious, but ensure your Apple Pencil itself has sufficient charge.
When to Call in the Pros: Identifying Repair Needs
While much can be fixed with software tweaks or simple accessory swaps, some issues are beyond the scope of DIY troubleshooting.
- Persistent Charging Issues: If you've tried all cables, adapters, port cleaning, and software resets, and your iPad still won't charge or hold a charge, the battery itself or the charging port hardware might be damaged.
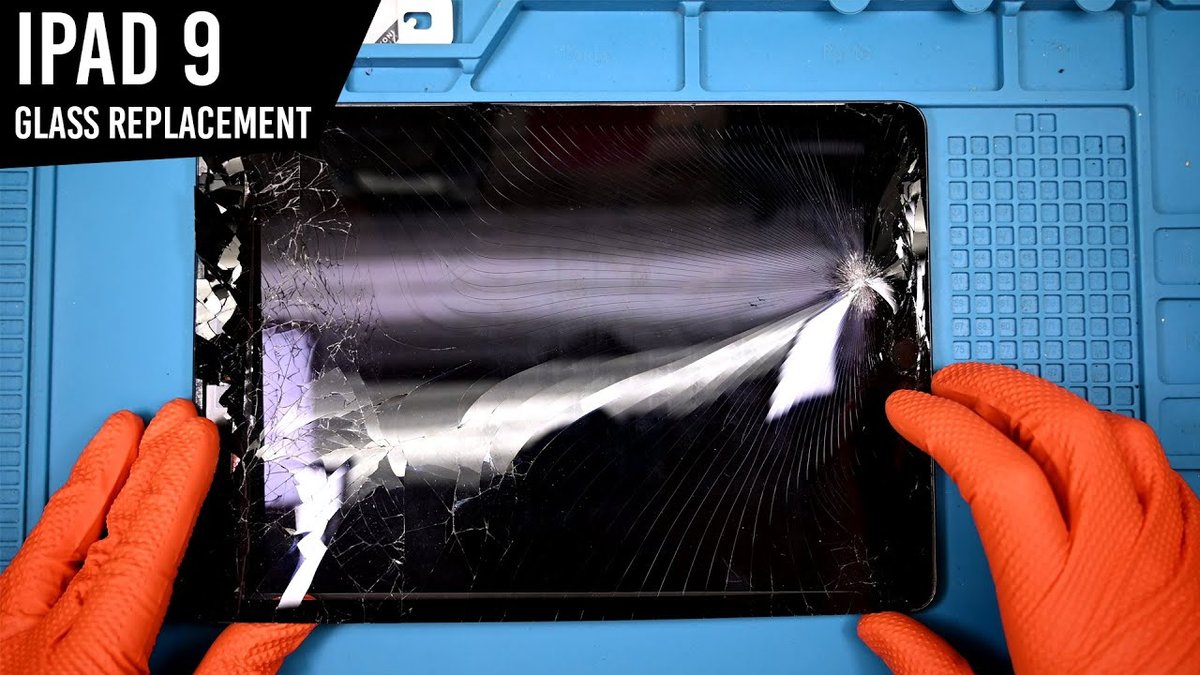
- Physical Damage: Cracked screens (LCDs or digitizers), severe dents, or water damage usually require professional repair. DIY screen replacements can be tricky and may void any remaining warranty. Cell phone repair technicians commonly deal with these issues.
- Dead Pixels (Severe): While a single dead pixel might be tolerable, a cluster or a large, dark spot indicates a failing display that needs replacement.
- Major Internal Failures: If your iPad is completely dead, gets excessively hot, or exhibits strange graphical artifacts after trying all software fixes, it could be a logic board issue.
- Water Damage: If your iPad has had contact with water, turn it off immediately, avoid charging it, and seek professional help. Attempts to dry it with rice or heat can often cause more harm.
For these more serious hardware problems, contact Apple Support to inquire about service options or seek out a reputable third-party repair shop. Be transparent about your iPad's age, as repair costs might sometimes exceed the device's current market value.
Proactive Maintenance: Extending Your Vintage iPad's Lifespan
Prevention is always better than cure. A little regular maintenance goes a long way.
- Regular Software Updates (Within Limits): Always install the latest iPadOS version compatible with your device. These updates often include performance improvements, security patches, and bug fixes that keep your iPad running smoothly.
- Battery Health Management:
- Avoid Extreme Temperatures: Don't leave your iPad in direct sunlight or a freezing car. Heat and cold degrade battery health rapidly.
- Optimal Charging: While modern batteries are smart, avoiding consistently draining to 0% or charging to 100% can slightly prolong life. Aim for keeping the charge between 20-80% when possible.
- Use Original Chargers: Stick to Apple-certified cables and adapters to ensure safe and efficient charging.
- Storage Management: Routinely check your iPad's storage in
Settings > General > iPad Storage. Delete apps you no longer use, offload old photos/videos to cloud storage or a computer, and clear app caches. - Physical Care:
- Cases and Screen Protectors: Invest in a good quality case and screen protector to guard against drops and scratches.
- Port Cleaning: Periodically inspect and gently clean the charging port and headphone jack (if present) to prevent dust and lint buildup that can interfere with connections.
- App Hygiene: Delete unused apps. Apps running in the background, even if you don't actively see them, can consume resources. Regularly review your installed apps and remove those you don't need.
The Vintage iPad's Enduring Appeal
Your vintage iPad isn't just a gadget; it's a testament to enduring design and functionality. With a little attention and the right troubleshooting knowledge, you can keep it running smoothly for years to come. By following these steps and understanding when to perform simple fixes versus when to seek professional help, you're not just maintaining a device; you're preserving a piece of tech history that still has plenty of life left in it. Embrace the journey of maintaining your vintage iPad, and enjoy the satisfaction of keeping a classic alive and thriving.